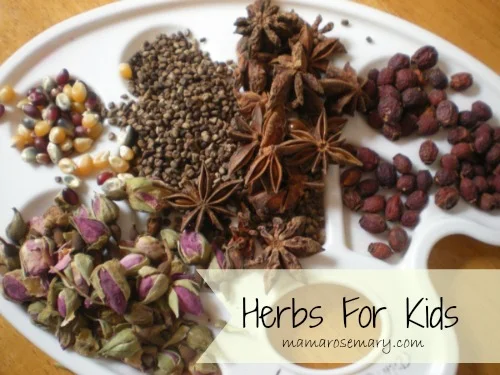
Honey Bee Chamomile Lotion Bars
/
Flecked with bits of chamomile, these lotion bars are extremely moisturizing, super soothing and quick to absorb. The infused chamomile and calendula helps to heal and soothe the skin. While the honey acts as a humectant helping to imbue the skin with moisture.
All this makes these bars simply wonderful for dry, cracked wintry hands and skin. My hands are regularly turned to sand paper at the preschool where I wash my hands at least 15 times on days that I work. These bars make my hands smooth and silky again in just a couple of uses!
Make these lotion bars for folks in your life with hard working hands ~ teachers, craftspeople, gardeners and parents!
Make Your Own
Ingredients ~
½ cup beeswax, I like to use the little one ounce bars for this project because they have a strong honey smell however the little pastilles work wonderfully too!
½ cup shea butter
1 ½ teaspoon honey
¼ + ⅛ cup chamomile & calendula infused grapeseed oil (see below) or you can just use plain grapeseed oil which will work just fine.
essential oils (optional)
Supplies ~
heat proof container for melting: pyrex measuring cup, pot, jar or can. (see step one below)
knife & cutting board if you are using blocks of beeswax
molds for your finished bars ~ silicone molds are great, as are soap molds, however you can even use muffin tins or other things you might have on hand.
Need supplies for crafting your own herbal creations and gifts?
Need supplies for creating your own herbal crafts? The Bulk Herb Store and Star West Botanicals* both sell wonderful, high quality herbs, containers, and plenty of other supplies to help you!
Find other supplies at your local grocery store and label at office supply and craft stores.

Instructions ~
Step 1: First get organized and ready to craft by setting out all your ingredients. Clean-up can be difficult for this project because the beeswax is hard to get off surfaces. So you may want to have special equipment set aside for projects that use beeswax. You can usually find a pot, pyrex measuring cup, cutting board and knife at a second-hand shop for next to nothing. (I prefer using a pyrex measuring cup with a handle and pour spout for ease of pouring into molds) Or you can simply use a very clean & dry jar or can that was destined for the recycling bin for melting the oil and wax. This makes clean-up a snap! Also, lay out your molds so they are ready for filling.
Step 2: If you are using bars of beeswax, carefully cut the beeswax into small pieces, the small the pieces, the faster they will melt.
Step 3: From here on out this project is easy peasy! Next place everything together in your melting container (reserving a small about of both the beeswax, oil & honey for adjustments later) and gently heat on low in your oven or in a hot water bath. Heat until the wax and oils just start to melt. Gently stir everything together very well to incorporate the honey.
Step 4: The Spoon Test ~ Check to see if the consistency of your lotion bars is what you want by placing a small drop of the mixture on a spoon and placing it in the freezer for a few minutes which will quickly harden the mixture. Test it out. If it is too soft add a bit of beeswax, if it is too hard add some more oil.
Optional Step: Add Essential Oils ~ These bars have a very delicate, lovely fragrance from the honey, beeswax & shea butter. Yet if you wish, you can add essential oils for extra scent and helpful soothing propeties. Here are essential oil suggestions that would smell amazing in these bars: cardamom, ylang ylang, peppermint, spearmint, lemon, orange, and lavender. Add the oils after doing the spoon test and before pouring into your molds. Use 30 to 40 drops total for this recipe.
Step 5: Once your have reached your desired consistency, pour the mixture into your molds. You will need to work quickly because the mixture will start to harden as it cools.
Step 6: It can be tricky to get the honey to stay harden properly as part of the bars. So if you find that the honey separates from some of your bars when they have set, you can remelt them and add about 1 more tablespoon of beeswax. Or if you have a bar or two that set with some honey all gooey around the edges, you can use that bar as a special bathtub melt just for you! (Beware of your tub becoming slippery!)
To read more about the properties of these essential oils and more please visit my Guide To Creating 4 Herbal Body Care Gifts which includes a little essential oil tutorial.

Chamomile & Calendula Infused Grapeseed Oil
1 tablespoon each chamomile & calendula flowers
4 ounces of grapeseed oil, you can substitute a heavier oil such as olive, almond, or apricot kernel
Instructions ~
If you have more time you can make a traditional infused oil preparation: place the flowers in a clean, dry jar. Cover the herbs with oil and put on a tight fitting lid. From here you have three options for infusing your oil.
Option 1: Let your oil infuse in a dark place for 4 weeks. Or make a solar infused oil by placing the jar in the sun.
Option 2: If you are in a hurry… Put the jar in the oven. Set the oven to the lowest temperature and leave the door cracked open. Let your oil gently infuse for at least 4 hours. I like to infuse mine for a minimum of 8 hours.
Option 3: Put a lid on your oil and then place it in a water bath either on the stove or in a crockpot with the water coming up the jar about halfway. Leave in the water bath and let your oil gently infuse for at least 4 hours. Be sure not to get any water in your oil. Water in oil causes spoilage.
Once your oil is done infusing strain the oil through a thin piece of cloth, cheesecloth works the best.
To give these great bars as gifts wrap them up in little muslin bags, put them in a tin or simply package in a little plastic bag with a bow!

Happy Herb Crafting!
Thank you so much for joining me!

*Please Note: This post contains affiliate links visit my affiliate page for full disclosure.Thanks for supporting Mama Rosemary and happy herb crafting!